Let’s face it, nothing can kill your vibe like an overheating engine during a summer road trip. Whether you’re stuck in traffic or cruising down the highway, an efficient radiator fan is your best buddy. If you’ve ever thought about tackling car repairs yourself, swapping out your Honda Accord radiator fan is a fantastic place to start. Not only will you save some cash, but you’ll also get that satisfying feeling of having done it yourself. This DIY guide is designed to hand you the tools, tips, and confidence to swap your radiator fan like a pro—no fancy garage needed. So roll up those sleeves and let’s dive into the nuts and bolts of keeping your ride cool and running smoothly!
Understanding Your Honda Accord Radiator Fan and Its Importance
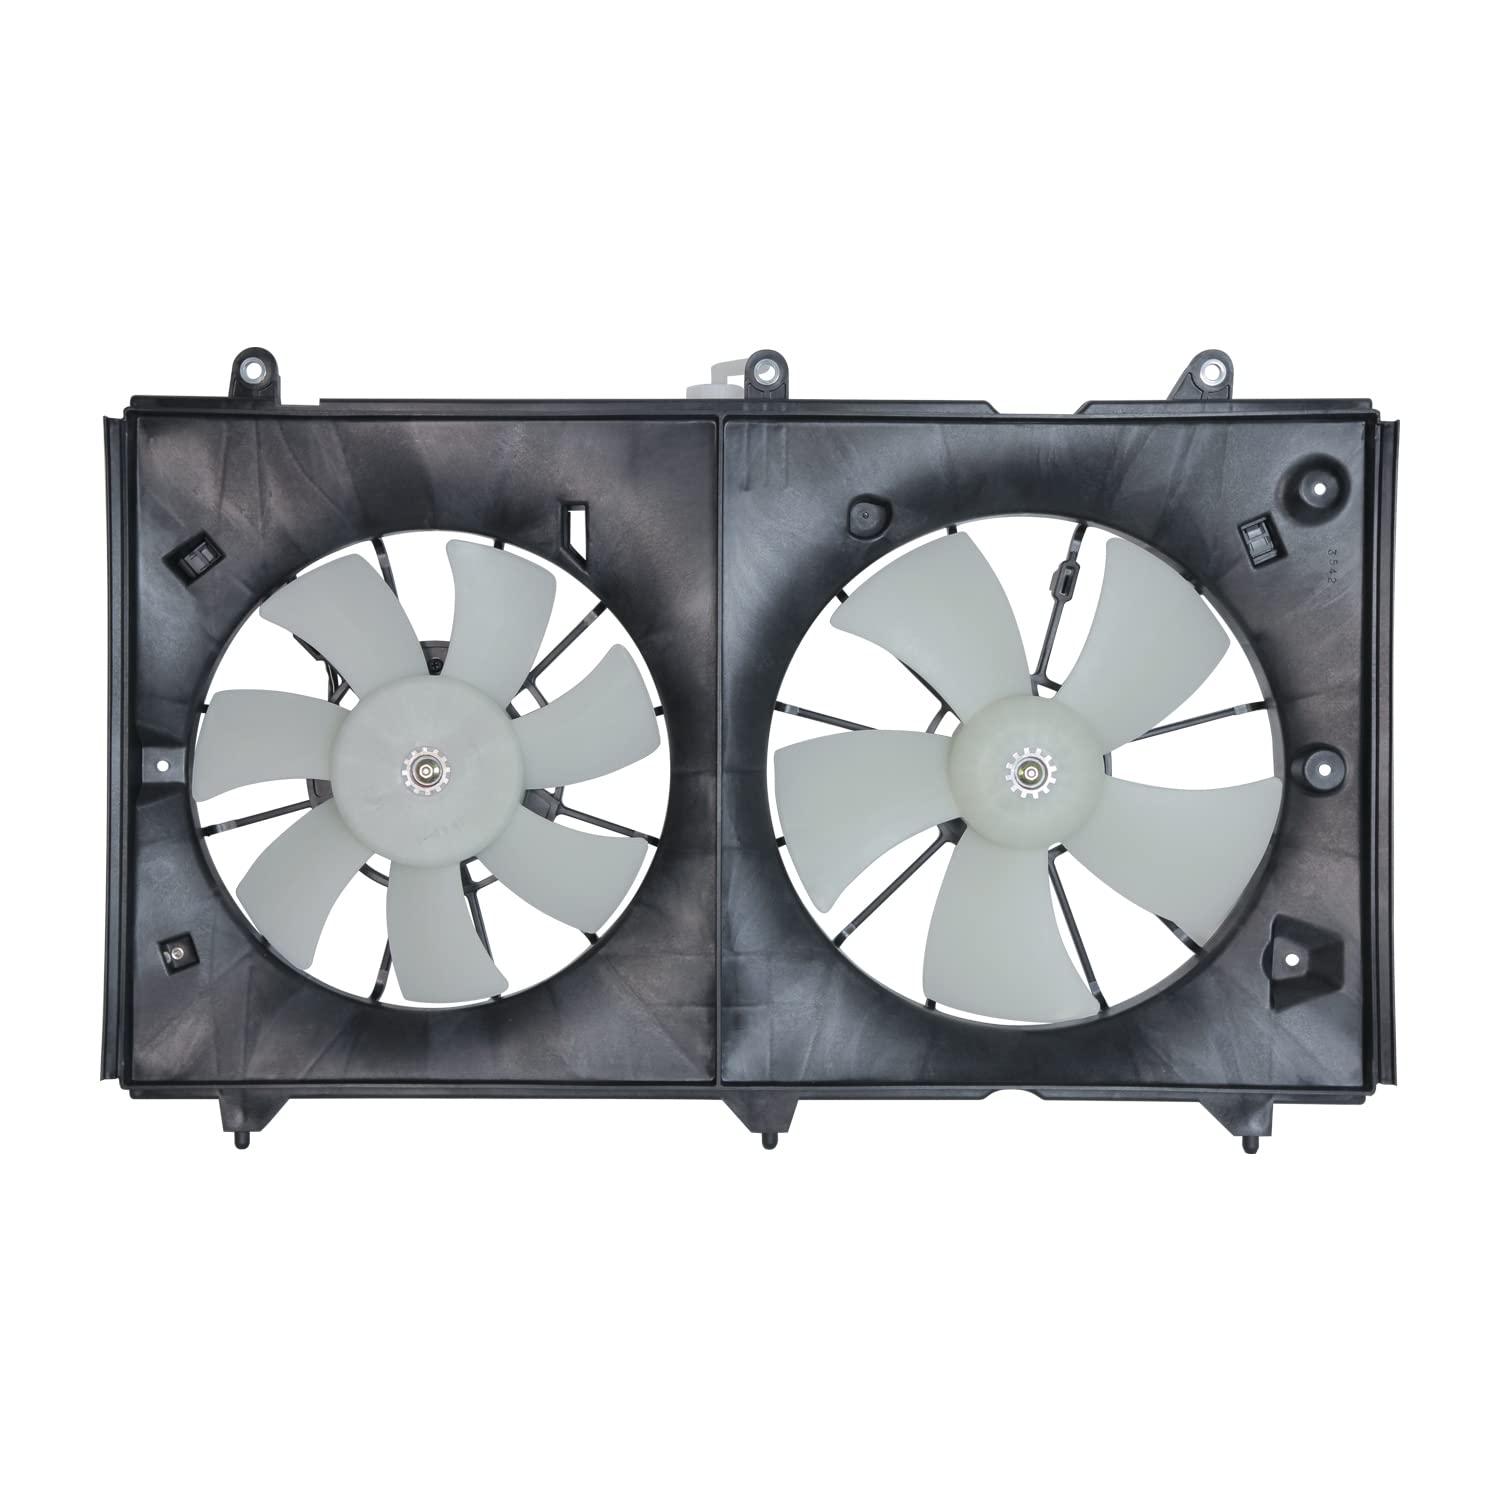
Your Honda Accord’s radiator fan plays a crucial role in keeping your engine cool, much like a fan in a stuffy room on a hot summer day. When you fire up your engine, it’s like starting a marathon. The radiator fan steps in as the unsung hero, grabbing a breeze to maintain the optimal temperature and prevent overheating. If the fan falters, it’s akin to running a marathon without hydration—you’re bound to face problems, including engine damage that could hit your wallet hard.
Understanding the symptoms of a failing radiator fan can save you both time and money. Look out for signs like an overheated engine or a strange whining noise when the fan is running. A quick check can reveal some common issues such as a faulty relay, a broken fan motor, or even just debris clogging the fan blades. Taking a moment to recognize these signs can mean the difference between a smooth ride and a costly repair job later. Remember, your car is a finely tuned machine, and each part is interconnected, so ensuring your radiator fan is in good shape is like keeping a watchful eye on that precious clock—everything ticks in harmony!
Tools You’ll Need for a Smooth Fan Swap
Changing out your Honda Accord’s radiator fan is a piece of cake if you’ve got the right tools at your side. Here’s your must-have toolkit for a smooth swap that’ll have you feeling like a pro in no time:
- Socket Set: You’ll need a ratchet and a variety of sockets, typically 10mm, 12mm, and 14mm. These bad boys will help you tackle those stubborn bolts.
- Wrench Set: A set of open-end wrenches will be handy for those tight spots where a socket just won’t fit.
- Screwdrivers: Keep both flathead and Phillips screwdrivers close, as they’ll aid in removing any clips or fasteners.
- Pliers: Needle-nose pliers are great for those tricky connections and wiring.
- Zip Ties: A few of these will come in handy for tidying up loose wiring once you’re done.
- Safety Gear: Don’t forget gloves and safety glasses. Always better to be safe than sorry!
Here’s a quick look at how to organize your work area for maximum efficiency:
| Tool | Purpose | Tip |
|---|---|---|
| Socket Set | Loosening and tightening bolts | Keep them in a tray to avoid losing pieces! |
| Wrench Set | Accessing tight areas | Use the correct size to avoid stripping |
| Screwdrivers | Removing fasteners | Magnetic tips can save time! |
Step-by-Step Guide to Replacing Your Radiator Fan
First off, let’s get your tools in order. You’ll need some essentials to make this job smooth sailing: a socket wrench set, a screwdriver, pliers, and, of course, a new radiator fan that fits your Honda Accord perfectly. Start by making sure your car is parked on a flat, stable surface and the engine is cool. Pop the hood and disconnect the negative battery terminal—it’s a safety must to avoid any electrical surprises. Now, locate the faulty radiator fan; it’s typically positioned right in front of the radiator. Carefully unscrew any panels obstructing access, then unplug the fan’s electrical connector. Remember, taking pictures as you go can save you from a puzzle-like assembly later!
With everything exposed, it’s time to remove the old fan. Use your socket wrench to unscrew the fan mounting bolts. Once it’s out, slide in the new radiator fan where the old one used to be, aligning it with the mounting holes. Reinstall the screws and reconnect the electrical wiring—just click it back into place until it’s secure. After you’ve double-checked that everything is tight and connected, reconnect the battery terminal. To make sure you’ve done things right, turn on your engine, crank the AC if you need, and watch the fan spin. If it’s working, congratulations! You’ve just saved yourself some cash and gained a boost of DIY confidence!
Tips for Troubleshooting and Maintenance After the Swap

Once you’ve made the switch, it’s crucial to dive into some troubleshooting and maintenance to ensure everything’s running smoothly. Check the wiring connections to make sure they’re secure and free from any corrosion. Loose cables can cause the fan to malfunction, so tug gently on each connection to confirm they’re snug. Also, look out for any strange noises when the fan kicks in; a grinding sound could signal a misalignment or a worn-out bearing. If you notice a burning smell, don’t hesitate—shut it down immediately! Your radiator fan is a key player in keeping the engine cool, and any weird behavior needs immediate attention.
After verifying all the connections, it’s time to shift gears into maintenance. Set a regular schedule to clean around the fan area. Dust and debris can accumulate quickly and impede airflow, so think of it as giving your Honda a breath of fresh air! Consider using a soft brush or compressed air to gently clear out any buildup. Additionally, monitor the coolant levels frequently; they can drop unexpectedly if there’s a leak. It might help to keep a little log for yourself—this way, you’ll stay ahead of any issues, kinda like keeping a diary for your car’s health! Trust me, a few minutes of upkeep can save you from bigger headaches down the road.
The Way Forward
And there you have it—your one-stop DIY guide to swapping out that radiator fan in your Honda Accord like a seasoned pro! Just like cooking a favorite recipe, it’s all about having the right ingredients, a sprinkle of patience, and a dash of confidence. You’ve gathered the tools, followed the steps, and maybe even learned a few tricks along the way.
Remember, taking care of your ride is not just about repairs; it’s about connecting with the machine that carries you through life’s adventures. So, the next time your Accord runs cooler than a cucumber, you can pat yourself on the back knowing you did it yourself. Keep those wrenches handy, stay curious, and don’t hesitate to dive into your next DIY project. After all, there’s always something new to learn or fix! Happy driving, and may your Accord run smoothly for many miles to come!
