Imagine diving headfirst into the world of Ubuntu, exploring every nook and cranny of this robust operating system without the fear of messing up your main setup. Sounds dreamy, right? Well, buckle up, because mastering Ubuntu on VirtualBox is not just a sweet slice of tech heaven; it’s an adventure that can be your ticket to becoming a savvy Linux user! In this guide, we’re going to harness the power of YouTube to take your skills from zero to hero. With engaging video tutorials and step-by-step walkthroughs, you’ll have everything you need right at your fingertips. Whether you’re a total newbie or just looking to level up your game, we’ll make sure you’re armed with all the knowledge and tricks you need to succeed. Ready to hit play on your journey? Let’s get this show on the road!
Unlocking the Power of Virtualization for Seamless Ubuntu Installation
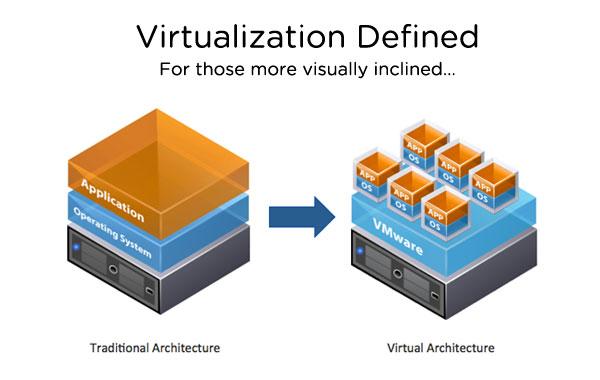
Virtualization isn’t just a buzzword—it’s the magic wand that makes installing Ubuntu a breeze! With tools like VirtualBox, you can create a digital environment that mimics your main operating system without messing it up. Imagine having the power to experiment with Ubuntu, test out apps, or gather precious Linux experience, all while keeping your main system untouched. It’s like having a sandbox where you can play around with all the cool tools and features without worrying about breaking anything. You might ask yourself, “What do I need to set this up?” The answer is simple! Just follow these steps:
- Download VirtualBox: Grab the latest version from the official website and get it installed.
- Get Ubuntu ISO: Visit the Ubuntu site and download the ISO file. That’s your golden ticket!
- Create a New Virtual Machine: Launch VirtualBox and click on “New.” Choose your settings according to your system’s specs.
- Configure Storage: Allocate enough RAM and disk space. After all, you’re setting up a whole new machine!
Once you have your virtual environment up and running, the installation of Ubuntu can feel as easy as pie. Just point VirtualBox to the ISO file, boot it up, and follow the on-screen instructions. You’ll be amazed at how smoothly everything transitions. It’s like flipping a switch that turns on endless possibilities! If you’re aiming for a seamless experience, ensure to tweak a few settings in VirtualBox. For instance:
| Setting | Suggested Configuration |
|---|---|
| Memory (RAM) | At least 2 GB |
| Video Memory | 128 MB |
| Processor Cores | 2 or more |
Adjusting these settings will enhance performance, and before you know it, you’ll be zipping through your Ubuntu journey with ease. The best part? You can always revert back if something goes awry, making this the safest playground you could ever ask for!
Essential Tips for Optimizing Performance and Speed in Your Virtual Machine

Getting the most out of your virtual machine can feel like trying to squeeze a grape into a shot glass – it’s not always easy! Start off right by allocating the right resources. Assign enough RAM; think of memory like a workbench: the bigger it is, the more tools you can spread out and use without feeling cramped. Aim for at least 2 GB, but bump that up if you’re running more demanding applications. Also, don’t skimp on CPU cores. The more cores you have, the more tasks you can tackle simultaneously, making your VM feel snappy rather than sluggish. ensure you’re using the latest and greatest version of VirtualBox – performance tweaks and enhancements can make all the difference.
Storage speed can be a game-changer for virtual machine performance. If you haven’t already, consider using SSD storage for your VMs; it’s like upgrading from a bicycle to a sports car. Coupled with the use of dynamic disk allocation, you can save on space while ensuring your VM grows as needed. Don’t forget to disable unnecessary features such as 3D acceleration unless you really need it; it can be a resource hog. And if your VM feels slow, take a moment to check the background processes – they can be like unwanted guests hanging around, eating into your resources. Keeping things streamlined will ensure your VM runs as smoothly as a well-oiled machine!
Exploring Must-Have Tools and Applications for Your Ubuntu Journey

When diving into the Ubuntu experience, having the right arsenal of tools and applications at your fingertips can make all the difference. Start with GIMP for all your graphic design needs; it’s like having Photoshop but free, and trust me, it packs a punch! For those who love to code, Visual Studio Code is a lifesaver with its sleek interface and endless plugins. Not to mention LibreOffice, your go-to for all document, spreadsheet, and presentation needs—think of it as the free version of Microsoft Office but totally capable. Don’t forget to explore Slack or Discord for smooth team communication, making teamwork feel effortless, just like sharing a good pizza with friends!
For system management, look no further than htop, which visually represents system usage like a colorful dashboard, making it easy to keep tabs on your machine’s performance. If you’re into media consumption, VLC Media Player is an absolute must—it’s versatile enough to play just about any file format you throw at it. And let’s not overlook Timeshift, your friendly neighborhood tool for backups and restores, ensuring that no matter what happens, your hard work is safe. Here’s a quick table of these gems to help you on your journey:
| Application | Purpose |
|---|---|
| GIMP | Graphic design |
| Visual Studio Code | Coding |
| LibreOffice | Document editing |
| Slack/Discord | Team communication |
| htop | System monitoring |
| VLC Media Player | Media playback |
| Timeshift | Backup & restore |
Navigating Common Challenges and Troubleshooting Like a Pro

Diving into the world of Ubuntu on VirtualBox can feel like navigating a labyrinth, especially when things go sideways. Don’t sweat it! Here are some common hurdles you might encounter and savvy solutions to tackle them like a pro. First off, if you find your virtual machine not starting or running sluggishly, check your system resources. Make sure you’ve allocated enough RAM and CPU to your Ubuntu VM; think of it like giving your car enough gas to cruise down the highway. Always remember to enable Virtualization Technology (VT-x/AMD-V) in your BIOS; without it, you’re driving with the handbrake on!
If networking becomes a pain in the neck, especially when your VM can’t connect to the internet, consider checking your network adapter settings. Switching to Bridged Adapter might do the trick, allowing your VM to act like a regular device on your network. To visualize this, picture your VM as a guest at a party—switching to Bridged Mode lets it mingle freely! Here’s a quick table to keep you on track when troubleshooting:
| Issue | Solution |
|---|---|
| VM won’t start | Check BIOS for VT-x/AMD-V settings |
| Slow Performance | Increase RAM & CPU allocation |
| No Internet Connection | Switch to Bridged Adapter |
Keep these tips in your back pocket, and you’ll breeze through those tech troubles while mastering Ubuntu on VirtualBox! Happy troubleshooting!
The Way Forward
And there you have it! You’re now armed with all the tools and tips you need to navigate the world of Ubuntu on VirtualBox like a pro. Whether you’re dipping your toes into the Linux pool for the first time or you’re a seasoned user looking to refine your skills, our YouTube guide has got your back. Remember, every master was once a beginner—so don’t stress if things feel a bit tricky at first.
If you enjoyed this rundown and found value in it, why not hit that like button on our YouTube channel? Subscribe for more handy tips and tricks, and share your own Ubuntu adventures in the comments. There’s a whole community out there waiting for your insights and experiences!
So, fire up your VirtualBox, dive into that Ubuntu experience, and don’t forget to have some fun along the way. Happy exploring, and may your coding journey be as smooth as a well-oiled machine!