So, you’ve decided it’s time to say goodbye to that YouTube video you once thought was a masterpiece but now feels more like a cringe-worthy relic of your past? We’ve all been there! Whether it’s an old vlog that didn’t quite hit the mark or a tutorial that’s now as outdated as dial-up internet, deleting a video doesn’t have to be a headache. Stick around, and I’ll walk you through a few easy-peasy steps to get rid of that digital memory faster than you can say “delete.” Let’s dive in and clear out your YouTube channel in no time!
Mastering the YouTube Interface for Effortless Video Management
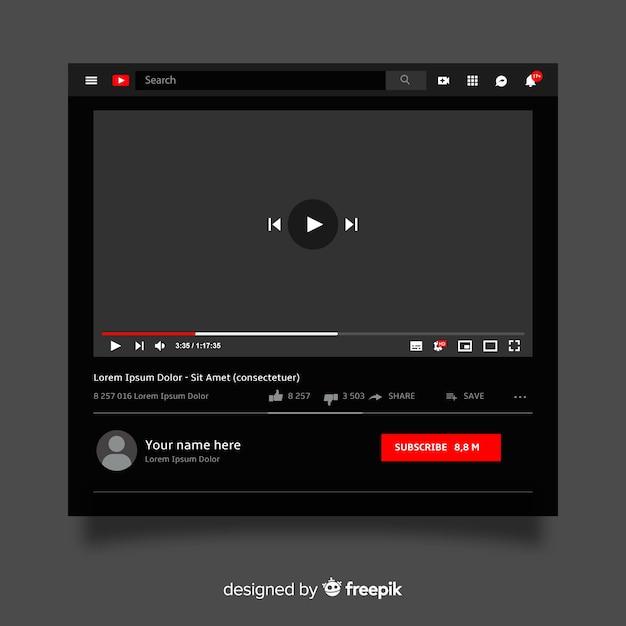
When it comes to managing your YouTube videos, diving into the interface might seem like entering a maze. But fear not—once you get the hang of it, you’ll be gliding through like a pro. First off, navigate to your YouTube Studio by clicking on your profile picture in the top right corner. This is your control center for all things video! Inside, locate the ‘Content’ tab on the left sidebar. Here, you’ll see thumbnails of all your uploaded videos like a colorful gallery waiting for your command! Need to get rid of a video quickly? Just hover over it, and you’ll find a small pencil icon for editing. Click that, and you’re halfway there!
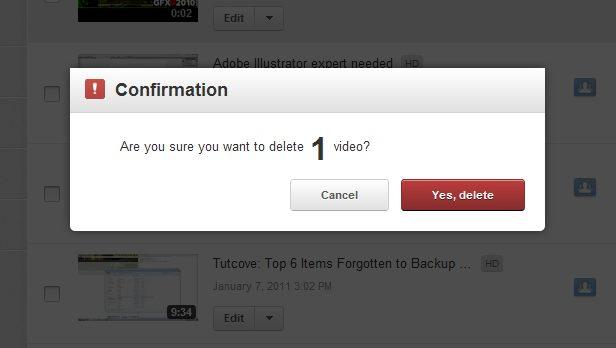
Now, the next steps are a breeze. Look for the options that come up after you click on the pencil icon—scroll down to find the ‘Delete’ option. Once you click that, a prompt will pop up to confirm your decision. Think of it as a digital bouncer asking if you’re sure you want to kick someone out of your exclusive party! Select “Delete” and voilà! That video is now gone faster than you can say “viral content.” Each of these steps is designed to keep your experience smooth, so you can focus more on creating and less on cleaning up. Here’s a quick snapshot of the process:
| Step | Action |
|---|---|
| 1 | Go to YouTube Studio |
| 2 | Click on ‘Content’ |
| 3 | Hover and click the pencil icon |
| 4 | Scroll to ’Delete’ |
| 5 | Confirm deletion |
The Quickest Path: Locating Your Video Like a Pro
Finding your video on YouTube shouldn’t feel like hunting for a needle in a haystack. Instead, think of it as cruising through your own personal video library. You’ll want to start by heading to your YouTube Studio dashboard, which is like the control center for all your video creations. From there, look for the “Content” section where all your uploads hang out. Here are a few quick tips to speed up the hunt:
- Use the search bar: Type in keywords related to your video title or description.
- Sort by filters: You can filter by upload date, visibility, or even the public/private status of the video.
- Watch for thumbnails: Recognizing the visual can help you locate your video quicker than reading a title.
Once you’ve located your target video, it’s time to proceed with deletion. Think of it like tidying up a cluttered space; sometimes, you simply need to let go. Click on the video’s options (the three vertical dots), and select “Delete forever.” It’s worth noting that once you hit that button, it’s like losing a treasure—you won’t get it back. Here’s a friendly reminder about what you need to do:
| Step | Action |
|---|---|
| 1 | Go to YouTube Studio |
| 2 | Find your video under Content |
| 3 | Click the options menu |
| 4 | Select “Delete forever” |
A Step-by-Step Guide to Hitting That Delete Button

Ready to cut ties with that YouTube video you’ve grown out of? It’s a breeze! First, log into your YouTube account and head to the YouTube Studio. Look for the Content option in the menu on the left. Once you’re there, you’ll see a list of all your videos. Find the one you want to delete—like spotting a pesky weed in your garden. Hover over the video, and you’ll see a few options pop up. Click on the Options button (it looks like three dots), and you’re halfway to freedom!
Now, it’s time for the big moment. After clicking that options button, select Delete. A confirmation box will pop up—don’t panic! This is just YouTube double-checking if you really want to go through with it. Give it a moment, take a deep breath, and click Delete forever. Voilà! Your video is gone, like a magic trick. Need to keep the process clear? Here’s a quick reference:
| Step | Action |
|---|---|
| 1 | Log into YouTube Studio |
| 2 | Click on Content |
| 3 | Select the video |
| 4 | Choose Options |
| 5 | Click Delete Forever |
What to Consider Before You Say Goodbye to Your Content
Before you hit that delete button, pause for a moment. Think about what your video meant to you and your audience. Consider these factors:
- Audience Engagement: Has this video sparked conversations or attracted comments that could influence your community?
- Performance Metrics: Check those analytics! Are people still viewing it, or did it drop off after a week?
- Content Value: Does this video serve a purpose, such as educating, entertaining, or inspiring your viewers?
You might also want to reflect on future implications. Sometimes, we underestimate the importance of our past work. Think about these points:
- Brand Identity: Does this video align with your current channel theme or personal brand?
- Potential Updates: Could you edit or update the video instead of completely deleting it?
- Legacy: Is there a chance that this content might become relevant again in the future?
Future Outlook
So there you have it! Deleting that pesky YouTube video is as easy as pie—maybe even easier! With just a few clicks, you can say goodbye to those cringe-worthy moments or unwanted content. Remember, it’s your channel, and you have the power to curate what feels right for you. Whether you’re trimming down your collection or just cleaning house, don’t hesitate to refresh your space. If you found this guide helpful, share it with your friends who might also need a little nudge in the right direction. Until next time, happy uploading (or deleting)!